You can now send Nintendo Switch screenshots directly to your smartphone or other smart device, but the process is a bit confusing. So we've created a step-by-step walkthrough that explains how screenshot transfer is done.
There are two ways to send a screenshot from the Switch to another device. Use the wireless method (using a QR code) to send screenshots to a cell phone or tablet, or transfer via USB cable to share images with a laptop or desktop.
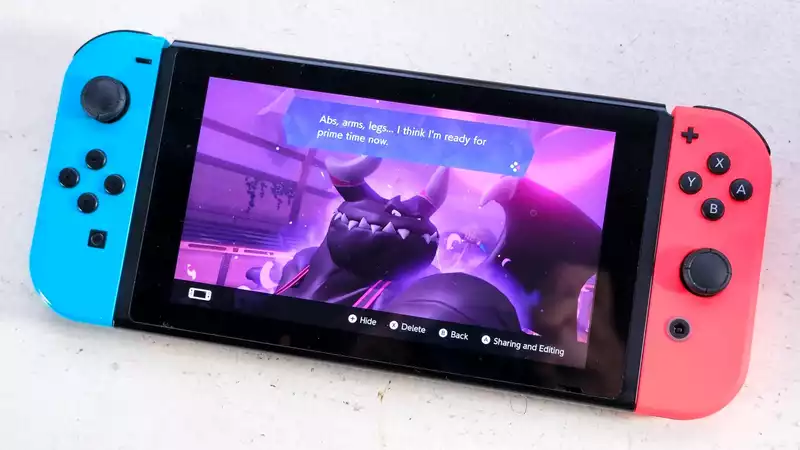
And as a reminder, to take a screenshot, click the small round button near the bottom of the left Joy-Con (top left of the D-pad on the Pro controller).
But however annoying this may be, it is much easier than the other two methods we have used in the past: posting directly to social media or pulling out the microSD card and plugging it into the computer.
We've run into only two problems so far: first, we can't connect the Switch to our Mac via USB. Second, while Nintendo claims to be able to "wirelessly transfer up to 10 screenshots and 1 video capture at a time," we can only send 1 video or 10 screenshots, not both. Selecting video eliminates the option to add photos, and selecting photos does not allow us to add video.
Start with how to send screenshots (and videos) to your phone or smart device.
All you need for this process is a cell phone or smart device with a camera, as a QR code reader is required.
Selecting "Batch Send" will check the other photos you wish to send. Currently, the limit for a single transfer is 10 photos or 1 video.
If you send a video, a download button will appear below it.
I am testing this on an iPhone, so your options may be different - and Android file management looks different.
If you are using an iPhone, I recommend using Add to Photo as sharing does not always work for me when taking pictures from websites - it often just sends a link to the site.
As noted above, this process did not work on Macs in our testing. You will need a USB-C to USB-C or USB-C to USB-A cable, depending on the port on your computer.
If your computer has a USB-C port, you will need a USB-C to USB-C cable; if not, you will need a USB-C to USB-A cable.
More screenshots and videos of the Switch interface can be found elsewhere.
Drag and drop them to your desktop or another directory.
You're done! You can no longer just use social media and microSD cards to get screenshots off the Switch!


Comments